How to Organize Camping Gear
 Outdoor Family Gear Organization
Having all your gear perfectly organized is the thing of dreams. And although I try my best, we still go through bouts where we get unorganized. And it seems like the only way to fix it would be a week of only me in the house to put it back in order (which obviously will NEVER happen).
So, how do I try and get it done? And I say TRY because I really do struggle here. There is just not enough time in a day! But, I start by trying to tackle small things or areas, one at a time.
How does the chaos start? When we don’t put something away when we get home. EVERY. SINGLE. TIME. You put it near where it goes, but just not quite in its home. Slowly the pile of “close enough” builds and then soon enough, it’s all out of order again. I am SO guilty of this! Despite my best intentions of staying organized, I am constantly guilty of not taking the extra few seconds to put the darn thing where it belongs!
Create an Organization System That Works for Your Family
The first step to having an organization that works is finding something that works for your family and the gear you have. It’s also important to have a system that the whole family can participate in so everyone can help put things away where they belong.
Decide How You Want to Organize
What works for us might not work for you and your spaces, so finding a solution that fits your family’s needs is the first order of business. Do you participate in a lot of activities that have some cross-over gear? Or is most of your gear a “single activity” gear? This might determine how you fill your bins and storage space. Also figuring out what you use frequently and not that often and prioritizing your space with that in mind.
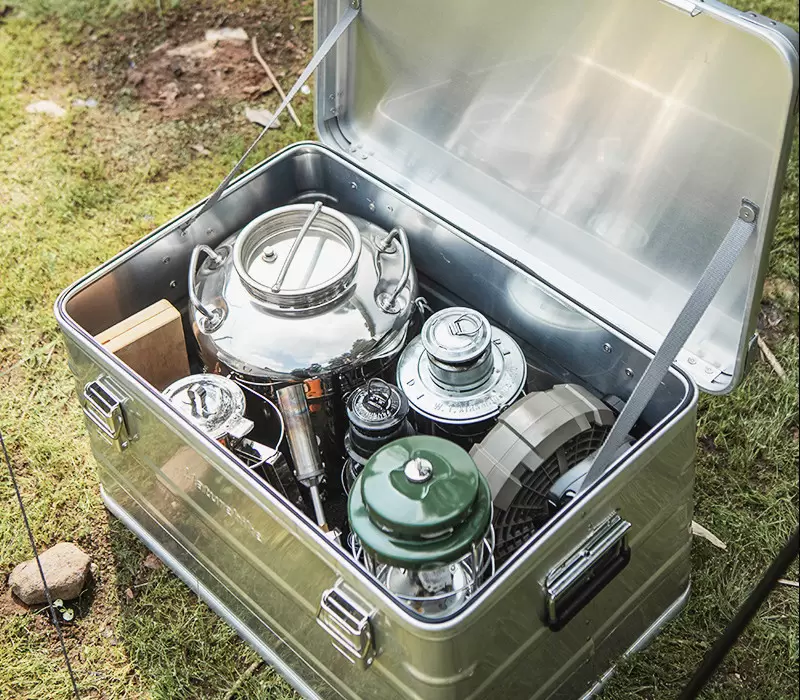
Use Stackable Containers
Aluminum storage boxes are a great way to keep your camping gear accessible, organized, and portable. Get a couple of long, flat bins and store all your clean and dry items inside according to general categories (sleeping gear should be kept with other sleeping gear, cookware with other cookware, etc.). If it helps, use color-coded tape or labels to mark bins and outline their contents. Once everything is organized, you’ll have an effortless time moving your bins from your garage to your trunk with no extra searching — cutting back on the time you spend preparing for your next outdoor adventure.
Shelves to store outdoor gear
Shelving helps keep your things organized, maximize space, and keep things off the floor (super helpful in basements and garages or any place that has the potential for a wet floor). There are many options for pre-made shelves or a quick Google search of DIY Storage Bin Shelves will leave you with many ideas on how to build your own!
We like using these types of wire shelves for all our totes and gear. They are sturdy, you can customize the height as needed and some with wheels or as an add-on if you like to be able to move things around. You can also get hooks and baskets to add to them for additional storage.
The wire shelves are also relatively easy to disassemble and move to a new house if you aren’t in your forever home yet. (A rubber mallet or a hammer with a piece of wood helps with disassembly.) Although I have assembled and disassembled by myself, it is best done with a partner.
Tip: If you have wire shelves without wheels, raise the lowest shelf to the top of a bin sitting on the floor. This will give you another “shelf”. Just be cautious how you load your shelves in this configuration as it could be a little more unstable than putting the first shelf at the bottom.
Just a reminder When using shelving, always keep heavier items toward the bottom. And if you have kids who might like to climb the shelves, make sure to anchor them to the wall so they can’t tip over.
Hang backpacks on hooks
Having a place to hang gear is awesome. If you have a basement with exposed beams above, grab some hooks and screw them in to create a gear-drying space. It’s a great way to hang your sleeping bags after a trip, hang your tent, or backpacks. Add an oscillating fan and your stuff will be dry in no time.
Add hooks on the wall for hiking poles, backpacks, life jackets, helmets, chairs, or for whatever needs hanging.
Hooks in the garage are a great way to store wet gear that you don’t want in the house yet. Perfect for life jackets, waders, wet rain gear, etc. L brackets or hooks are a great way to store chairs and tentpoles.
We keep hooks in the garage for hanging wet life jackets and gear after a trip. We keep huge bins for different sports (life jackets get stored in a big tub, backpacking packs and gear in another tub, stoves/fuel/bear spray in another, 2 kitchen gear tubs (1 for car camping, 1 for backpacking). Paddleboards are kept hanging off ceiling racks and bikes hang on walls. We keep our daypacks packed and ready to go in the mudroom!
Outdoor Gear Storage Hacks
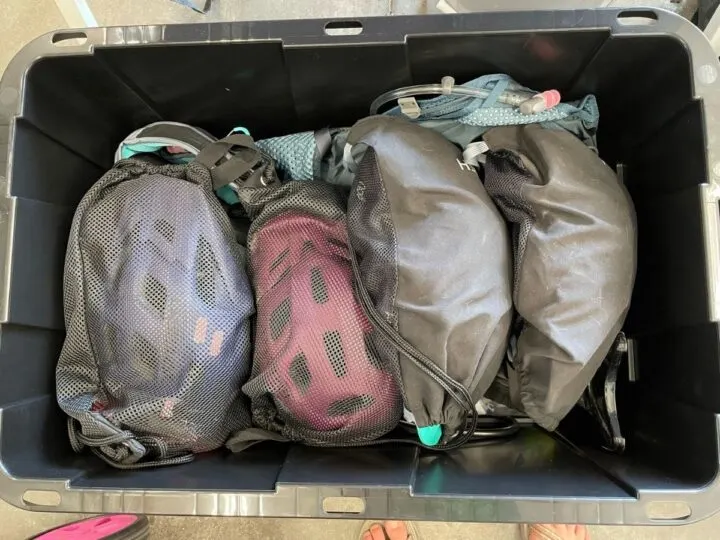
Use Storage Bags
A big lifesaver for us lately has been using mesh bags for our bike helmets. The idea came to me after my new bike helmet came with a bag, I went and ordered mesh bags for the girls’ helmets right away. I love that they are pretty durable and have a hook at the top for hanging. We have a hook on the garage wall where they hang.
Each girl has their own bag and it stores their bike helmet, gloves, and knee pads. We often drive to go bike, so the bags have been super handy when we are loading up.
The bags would also work great for winter sports helmets or other gear that needs ventilation.
For bigger balls or sand and water toys, I like larger mesh bags. Just toss all the wet water play toys in it, leave them in a ventilated area, and DONE.
Label your gear
Labels make everything so much easier. Label all your storage bins, bags, and totes. Label clothes, jackets, and mittens. Label, label, label! It helps you find what you are looking for faster and help get your stuff back to you if you lose it (hopefully).
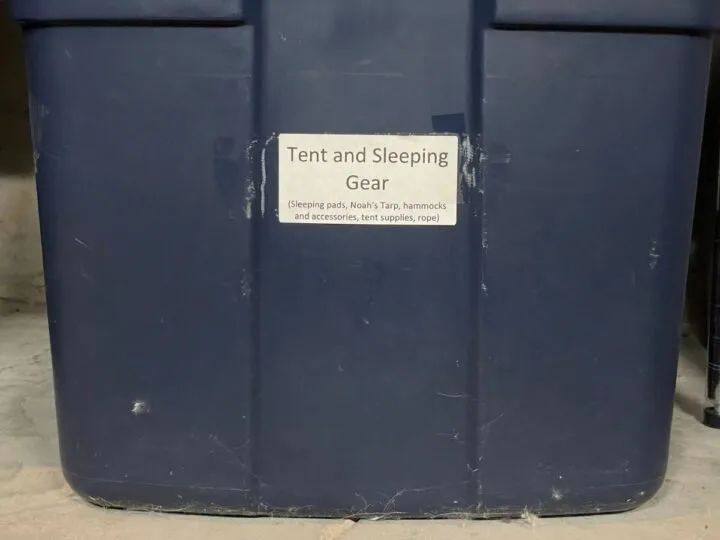
For labeling my bins, I prefer having typed labels rather than handwritten ones. I think it gives a neater appearance and I don’t love my handwriting. I like using shipping labels with a big heading with the main contents i.e. “Water Supply and Storage” and in little text below, a little more descriptive like “bladders, bottles, canteens, stuff sacks, and hauler”. Then, just stick them in the bin! Sometimes you need a little extra packing tape to hold them on, but most of the time they hang on if they are just in your basement. The shipping labels also peel off clean when it’s time to change.
You can also just stick masking or duct tape to the bin and write with a sharpie as well.
For labeling clothing, jackets, and gear, I have been super happy with Inchbug labels. We have them in the girls’ jackets, mittens, water bottles, lunch pails, helmets, and more. I even ordered some plain ones for some of our grown-up things like the dog’s remote, our lunch pails, helmets, etc.! We use the rectangle and clothing tag pal labels. I have only ordered one set of each so far, but I haven’t even used them all up yet, and I feel like I have labeled a lot of stuff!
How to keep books and maps organized
I feel like every time we come back from a trip we have more maps, guidebooks, field guides, and pamphlets from the destination we just explored. So, what do you do with all those?? Some of them you probably don’t need to keep long term, so recycle or pass them on to a friend headed there. For what you are keeping, figure out a filing and storage system that works for you, and file them away.
For books, we love to have our guidebooks just on a bookshelf in our living room. Adventure is what we love, so we keep the books where we can see them remind us of the adventures we have had and are going to have! For those nice hiking maps you purchased, make a spot in your filing cabinet or get a file box for your items and organize them by state, region, etc.
If space is an issue or you don’t need to buy a new book for your trip, try checking your local library before your trip. Then you can just return the book when you get home and that’s one less book to store!
Camping Gear Storage Ideas: Tents
After our tents are dry, we store them in their storage bag on a shelf with our totes. We store the tent poles separately though!
Tent poles with elastic cords in them don’t like to be kept bent and shoved in a bag. Store them connected, or mostly connected behind a couch, under a bed, through the rafters, or install some “L” brackets to hang them from in order to keep them extended.
How to Store Roof Top Boxes, Canoes, & Kayaks
We have a rooftop box that gets used infrequently. We needed it out of the way in the garage, so we hoisted it up to the ceiling! A simple pulley system can work for rooftop racks, kayaks, canoes, paddleboards, or even bikes. The goal… get stuff off the floor so you have space to park and work!
How to Store Sleeping Bags and Pads
Sleeping bags should be stored loose, not compressed (after it’s clean and dry). Most sleeping bags come with a storage bag. You can hang these from hooks, toss them in a bin, or leave them on the shelf. Just make sure they can breathe!
Our self-inflating sleeping pads are stored unrolled with the valve open under a spare bed. Other great locations include behind a couch or standing up in a closet. Non-self-inflating can be stored by the manufacturer’s recommendation, but most are good just getting tossed in a bin after they are clean and dry.
Stay Organized and Stay Ready
Staying organized is easier said than done, but hopefully, you can work together as a family to figure out what works best for you so you can find what you need for your next adventure quickly!
In order to stay ready for our next adventure, I like to have a few extra totes that have no purpose except to get packed for trips. They normally are just sitting empty in the basement, waiting for an adventure. However, getting them unpacked as soon as we get back is sometimes a challenge.
Originally posted 2023-09-25 12:37:27.