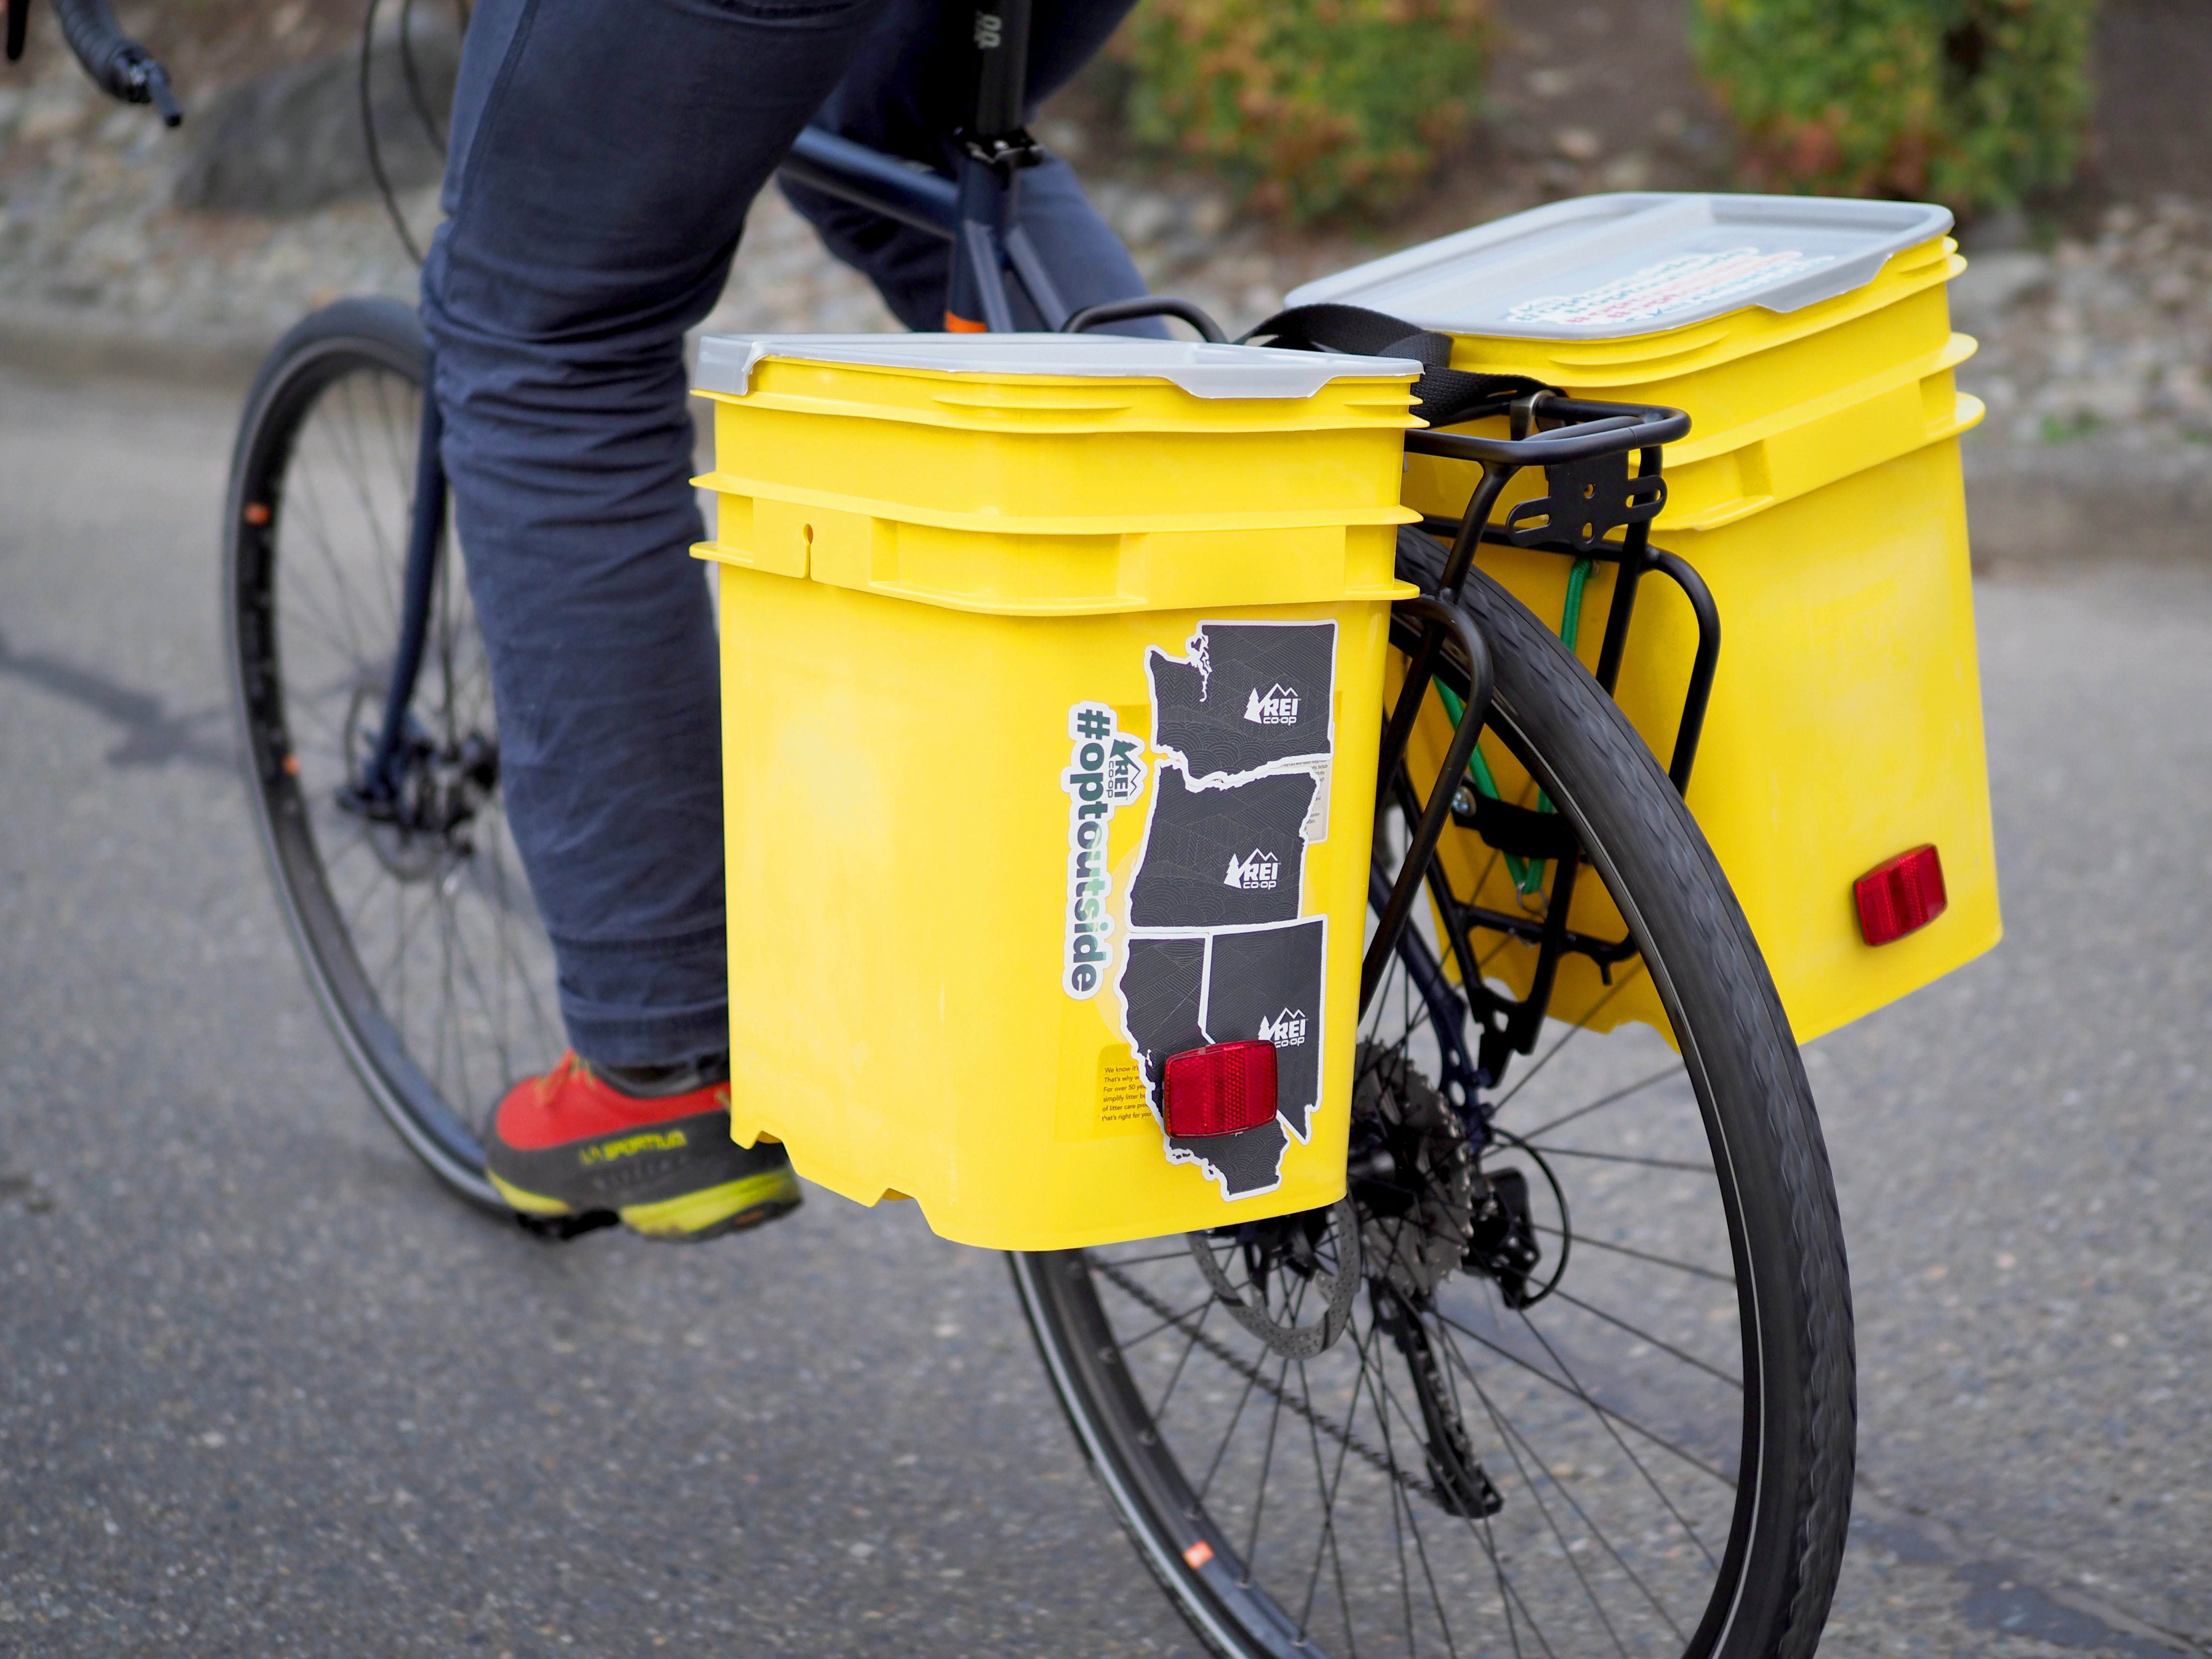
DIY: Make Your Own Bucket Bike Panniers
The unheard of thing about cycling is its accessibility. A motorcycle, whether it’s outmoded or new, low impress or pricey, is freedom on two wheels. Kitting out your bike doesn’t want to be pricey both. Upcycled plastic buckets affect sturdy, qualified panniers for urban commuting or weekly visits to the local farmers market. Throw on some stickers and you’re ready to roll.
Presents:
- Two rectangular plastic buckets, similar to kitty litter or condiment tubs (these can also very well be bought empty on-line or came upon at restaurants; quiz round!)
- 4 anodized metal hooks with ¼” holes; we ancient wall hooks from a home goods store
- Eight grommets with installation kit, sized to suit your bungee wire
- Two 15-mosey lengths and two 4.5-mosey lengths of 1″ nylon webbing
- 4 ½” ¼-20 screws
- 12 ¼” flat washers
- Eight ¼” lock nuts
- 4 ¾” ¼-20 screws
- Two 18-mosey lengths of bungee wire; (the size will depend on the size of your bike rack)
- Two metal S-hooks
Tools:
- Utility knife
- Marker
- Drill with ¼” and three/Eight” bits
- Screwdriver
- Wrench
- Pliers
Directions:
1. Put together the buckets
Utilizing a utility knife, conscientiously desire the further plastic from one facet of both buckets. This would possibly perchance per chance enable the hooks to sit down down down flush in opposition to the bucket walls.
2. Drill hook holes
Space two hooks for your bike rack about 5-6 inches apart (trying to gain your rack). Preserve a bucket to the hooks with the lid lip factual above the rack. Price where the hook holes hit.
Utilizing the ¼” bit, drill a gap at each designate. Dapper away any extra bits of plastic. Repeat with the second bucket.
three. Set up hooks and elevate strap
Put grommets on both ends of a 15-mosey piece of webbing following the instructions on the grommet kit. This will be the pannier elevate strap.
Space a hook on high of a webbing grommet and align the holes with a drill gap as pictured above. Insert a ¼” ¼-20 screw, and thread a ¼” washer and a nut onto the screw contained in the bucket.
Tighten the nut with a screwdriver and a wrench. Guarantee that the hook is straight and would possibly perchance per chance presumably’t rotate or transfer round. Repeat on the different gap, making a loop with the webbing. Repeat on the second bucket.
4. Set up retainer strap
Space a bucket for your rack. Measure 2 inches above the rack’s lower bar, and affect two marks about 4 inches apart as shown.
Set up grommets on each discontinue of a 4.5-mosey piece of webbing.
Align the webbing with the marks, and re-designate on the grommet holes. Use the ¼” bit to drill a gap at each grommet designate.
Space a ¼” washer beneath a grommet and insert a ¾” ¼-20 screw into the bucket and tighten a washer and a nut on the within. Repeat on the different facet so the webbing sits evenly between the two holes. Repeat on the different bucket
5. Set up bungee wire
Price a space 1.5 inches beneath each hook. Change to the three/Eight” bit and drill a gap at each new designate.
Set up grommets at each gap to give protection to the bungee from interesting edges.
Crimp one S-hook onto a size of bungee wire.
Insert one discontinue of the bungee wire correct into a grommet and knot on the within the bucket to steady. Thread the loop and the S-hook beneath the retainer strap, with the un-crimped hook going thru faraway from the bucket.
6. Bonus step: Add reflectors
We determined to add reflectors to our panniers. On the facet of the bucket that faces motivate when positioned for your bike, drill a gap the command of a 5/forty twond bit (or with out reference to size your reflector requires).
7. Set up panniers for your bike
Space the upper hooks over your bike rack.
Put the S-hook to the lower fragment of your rack—adjust the bungee size as crucial to create a snug retain.
Eight. Hit the avenue
Deck out your panniers with stickers as desired and bag cruising. Whether they’re toting groceries or a switch of clothes, these durable panniers are the finest, low-impress kit for a bike pleasurable existence. Throw on some DIY bike fenders and you’re ready for an urban cycling adventure.
The put up DIY: Produce Your Occupy Bucket Bike Panniers appeared first on REI Co-op Journal.
Originally posted 2018-03-09 19:15:15.